The Custom Jewelry Process
No consumer product makes my senses tingle more than something that’s been made for me. A leather bag that can be cut to my specifications? Drooling. A custom-mixed perfume? Coveting so hard.
Custom jewelry is often the most meaningful for my clients, whether because we’re using heirloom stones, or creating something for a very special occasion (like an engagement!). Approaching a custom jewelry project can be very intimidating- many first-timers don’t know where to begin. Instead, they just let those old diamonds sit around gathering dust at the bottom of their jewelry box waiting for “someday” instead of turning them into a fabulous ring.
I’m here to tell you that’s diamond abuse.
I want to take the mystery out of the whole process by showing you each stage of production for a set of custom bangle bracelets I created for a client last year. By watching the project develop, you’ll see what it’s like to work with me on a custom design from start to finish.
Phase One: Inspiration

At our consultation and my client showed me this old pile of jewelry. There were some great raw materials but my gal wasn’t wearing any of these pieces.
Let’s face it. It’s because they’re ugly.
I removed the stones and what popped out at me? We had a gorgeous palette of purple and blue stones to work with. That got my creative juice flowing and I began to start envisioning the design.
At this phase of a custom project, I’ve chatted with my client about what she wants, and I know what materials we’ve got to work with. To move forward into spending time on designing and sketching, I ask for a small deposit that will apply towards the total for the final piece.
Phase 2: Design and Sketch
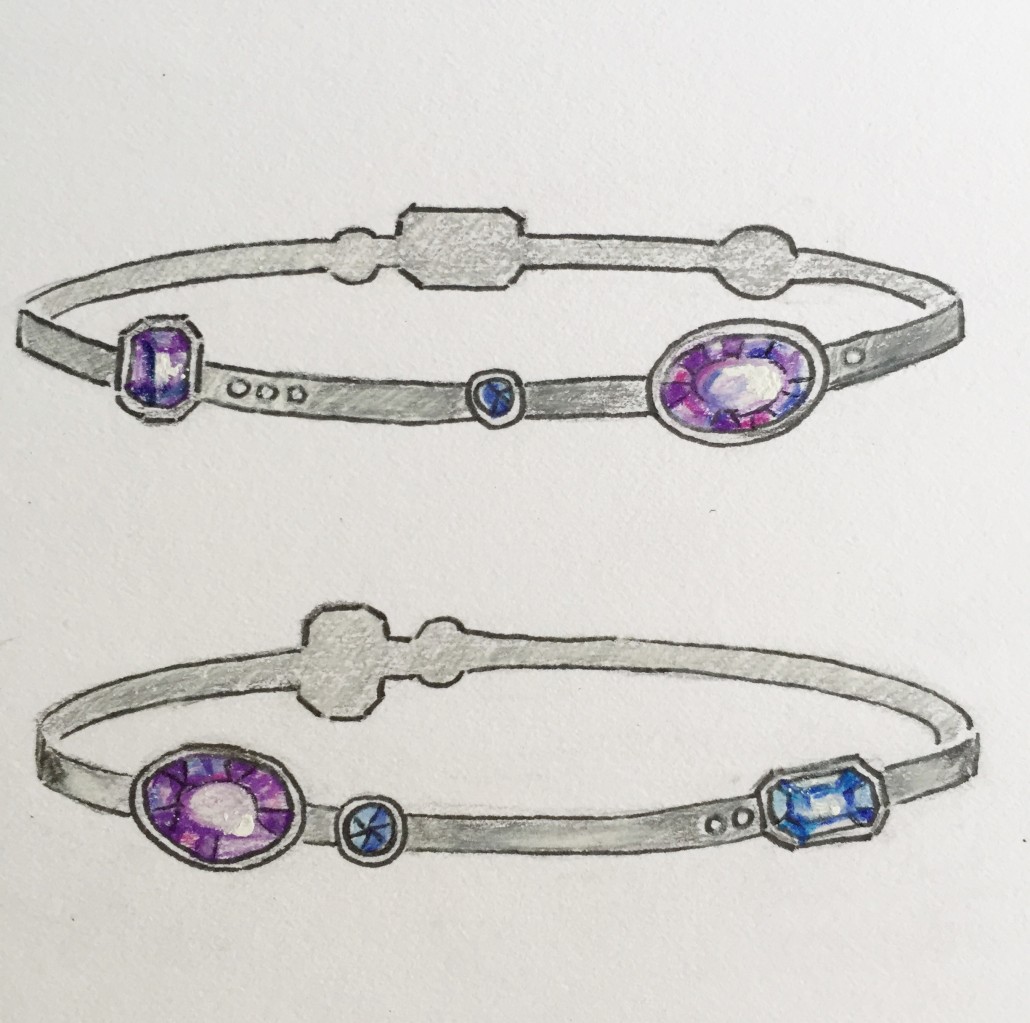
I always design my custom work within my aesthetic. That means you can expect clean bezel settings, simple silhouettes, and rich textures. Because we had such a variety of stones, I thought sprinkling them around a set of bracelets would be fun. No matter which way the bracelets turn, there is always something different to sparkle up at you.
Each sketch comes with an estimate for the total price of the finished piece. I always stick to my estimate unless we decide to change the scope of the project at some point later down the line, which is pretty rare. After my gal approved the sketch and estimate for the bangles, it was time to put them into production. At this point in the process, I ask for a 50% deposit on the estimate so I can buy materials and begin actually making the piece.
Phase 3: Wax Model Production
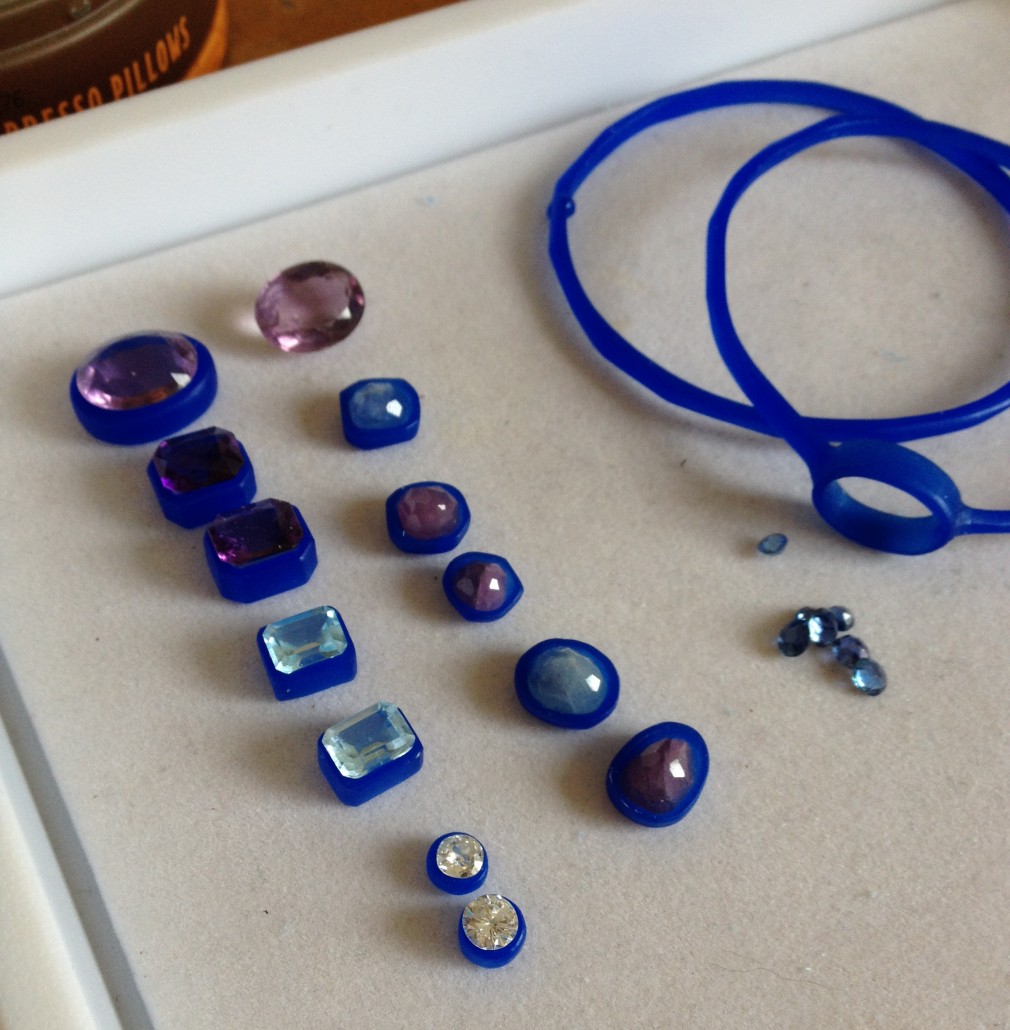
Each stone needed a custom setting carved in wax. I carved each one, and then delicately assembled them into their bangles. You might be thinking, “Wow, that looks like a lot of work!”
You would be right about that.
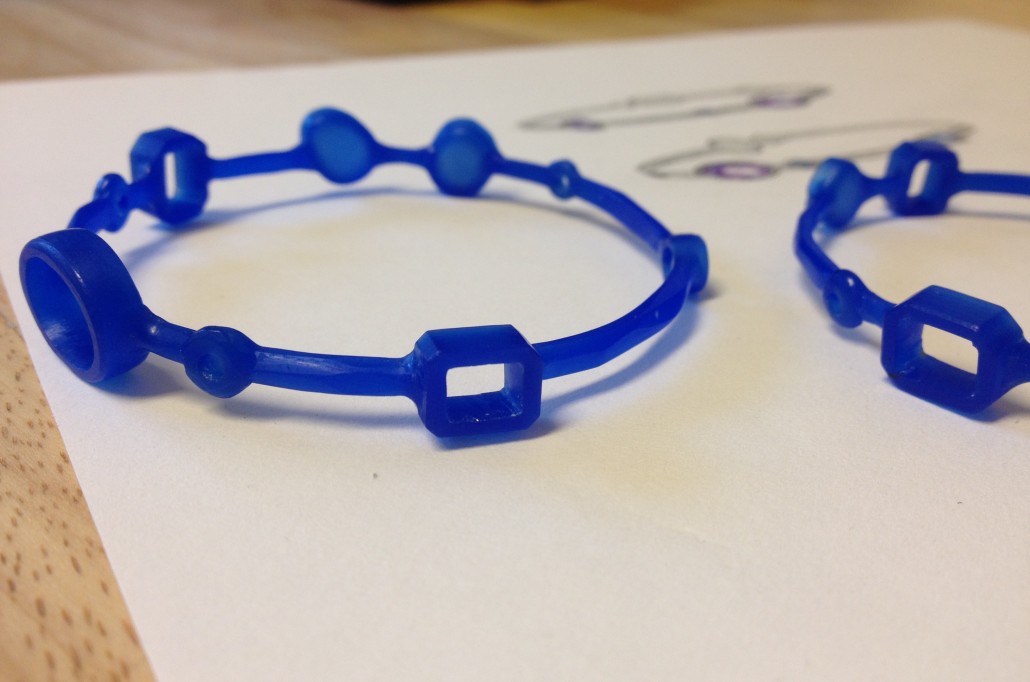
Each bracelet form had a lovely organic texture. I always show my wax models to my clients before we cast them into gold. That way, if we need to make a change, we can do it easily and inexpensively.
Once everything looked perfect I passed the finished models on to my casting artist. She took the waxes, made a one-time-use mold, and cast them into 14K white gold.
Phase 4: Casting and Finishing
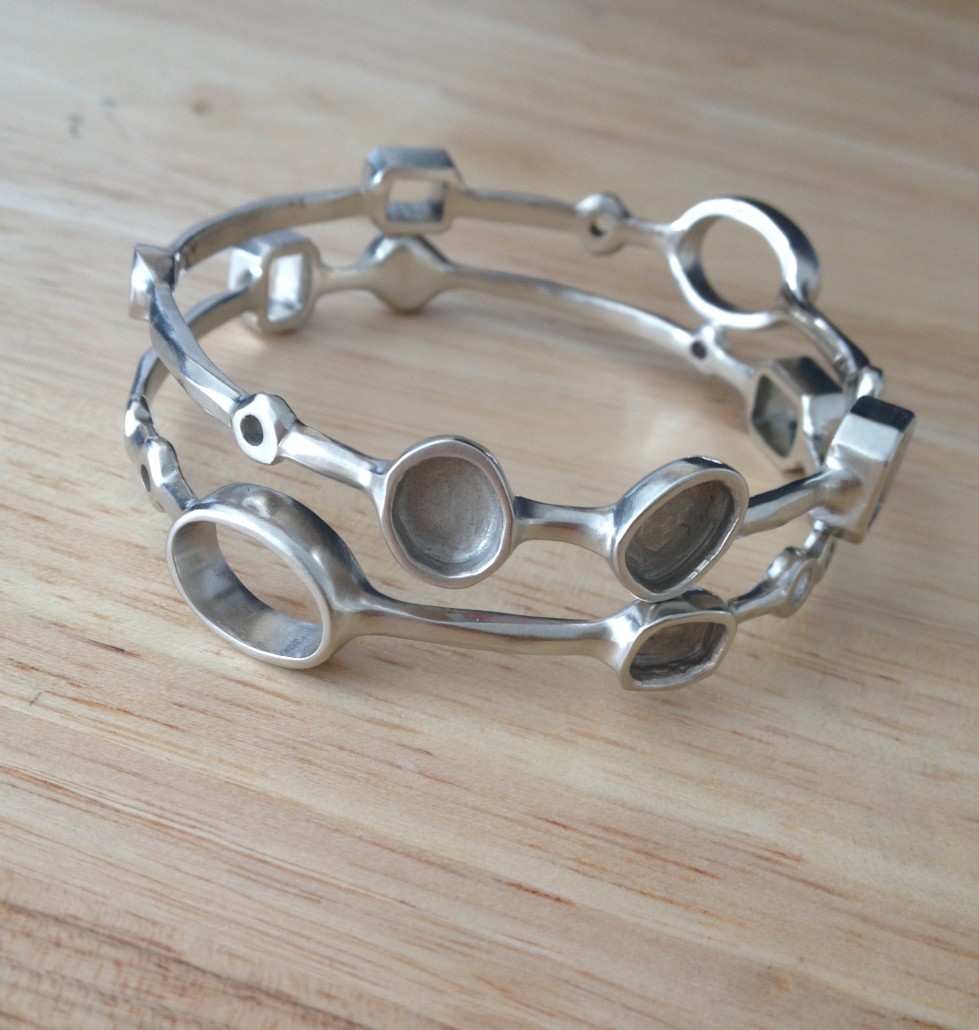
I spent lots of time cleaning, sanding, and finishing all that gorgeous gold. After putting a final mirror polish on the inside, they went to my diamond-setter extraordinaire to have each unique stone fixed into it’s custom setting.
Phase 5: Final Stone setting
And that’s how we got here.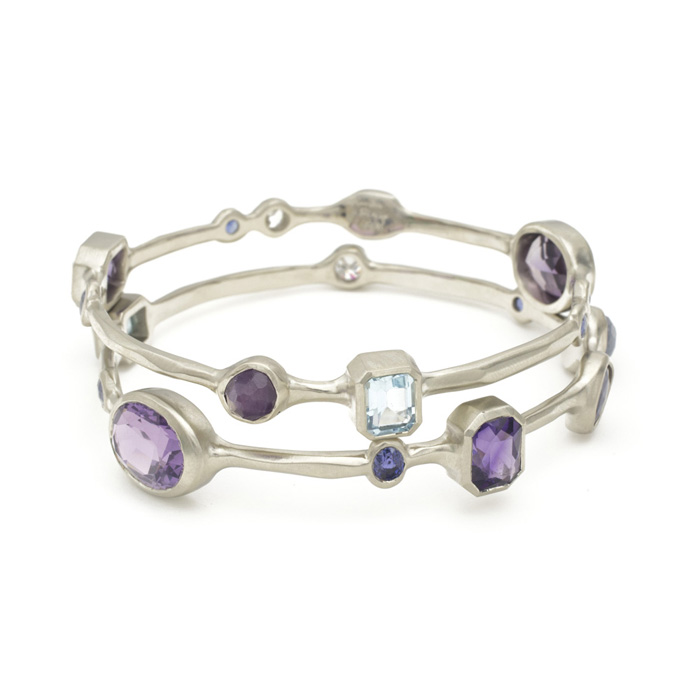
Once the piece is finished I deliver it into your eager little hands and collect the remaining balance. That’s it! Mystery solved- this is how a custom piece of jewelry gets made from start to finish.
Now go paw through that jewelry box and dig out those old pieces you never wear! Let’s make them into something you love.
